Originating in France, the word “charcuterie” specifically refers to cold, sliced meat (or a shop that sells those meats). Today, people commonly refer to any type of meat and cheese assortment as a charcuterie board. While a well-seasoned “charcutier” (one who prepares charcuterie) may scoff at what they would simply call a “meat and cheese board,” cheese has actually become the headliner for many. Nowadays, you definitely don’t need to be a meat and cheese expert to throw one together.
Charcuterie boards are a perfect appetizer for your spring/summer entertaining. Most of the time, they involve absolutely no cooking, and can be prepped and served to your guests quickly. While there is no right or wrong way to assemble a charcuterie board, if you’re totally lost and need some guidance, here are a few tips to make sure your board assembly is as easy as possible (so everybody can hurry up and EAT!).
Cheese
Most cheeses belong to four main categories: aged, soft, firm, and blue. Many people try to provide at least one option from each cheese category to ensure a variety of textures and flavors. For aged, try a Cheddar or Gouda. Some great soft cheeses are brie, camembert, and chèvre. Parmigiano-Reggiano or Gruyere are options for firm cheese. When it comes to blue cheese, Gorgonzola and Stilton are common favorites. Make sure to use separate knives for each cheese so the flavors don’t mingle, and make sure to label each of them for your guests. Also, serve your cheese at room temperature to get the most out of their flavors!
Meat
It’s difficult to go wrong with your meat selection. Just aim for a variety of flavors with your cured meat, and ask for help at your deli if you’re having trouble choosing. Many people choose meats from each preparation style: whole-muscle cuts (such as prosciutto), cured sausages (such as Spanish chorizo), and forcemeats (like pâté). These are very loose guidelines, and can be changed to your preferences (for example, I am not a fan of pâté, so you’ll see it’s not included).
Accompaniments
Different types of bread and crackers are the most important accompaniments for your board. I like to go with a type of bread/cracker that is sturdy for spreading cheese on, and another that is good for dipping. With the rest of the accompaniments, aim for both sweet and savory items to “fill in the blanks” of your board. Fruit, vegetables, condiments, chocolate, preserves, nuts, dips, and pickles are some of the many accompaniments to choose from! Here are come extra tips that will help you with your selection!
- Leaving bread whole will ensure it will stay soft and fresh longer.
- Marcona almonds are more popular for cheeseboards, as opposed to the common California almond, because their sweetness and softer texture makes a great pair for soft and Spanish cheeses.
- If they are easy to access and aren’t too tall, serve jams & preserves in the jars they come in.
- Plan for 2-5oz. of meat and cheese per person.
- Olives are great for pairing with Italian meats like salami or prosciutto.
Assembly
Everybody chooses different ways to create their boards. I like to place the largest items in first, like bowls holding certain accompaniments, then try to build around them. After the large bowls, I typically place the cheese so I know the strongest cheeses have a space apart from each other. Then I add the meats, and fill in any blanks with more accompaniments like nuts and berries. You can either create your board with space around each item to make everything easier to access, or go crazy like I do and fill in every single available space (I’m a sucker for presentation).
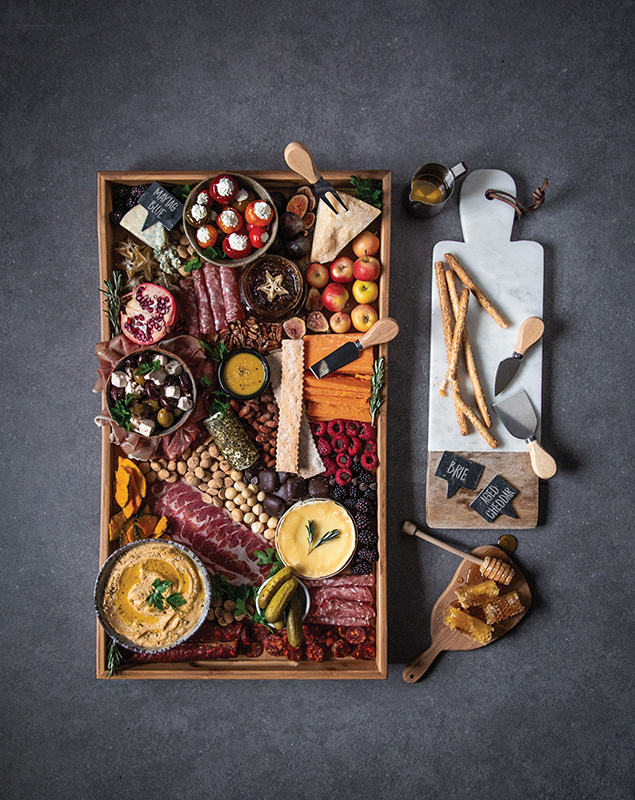
What was in my charcuterie & cheese board?
MEATS
– Calabrese salame
– Del duca prosciutto
– Capocollo
– Spanish chorizo
CHEESES
– Brie
– Blue Cheese
– Aged Cheddar
– Garlic & herb goat cheese
– Parmigiano-Reggiano
ACCOMPANIMENTS
– Marinated olives with feta
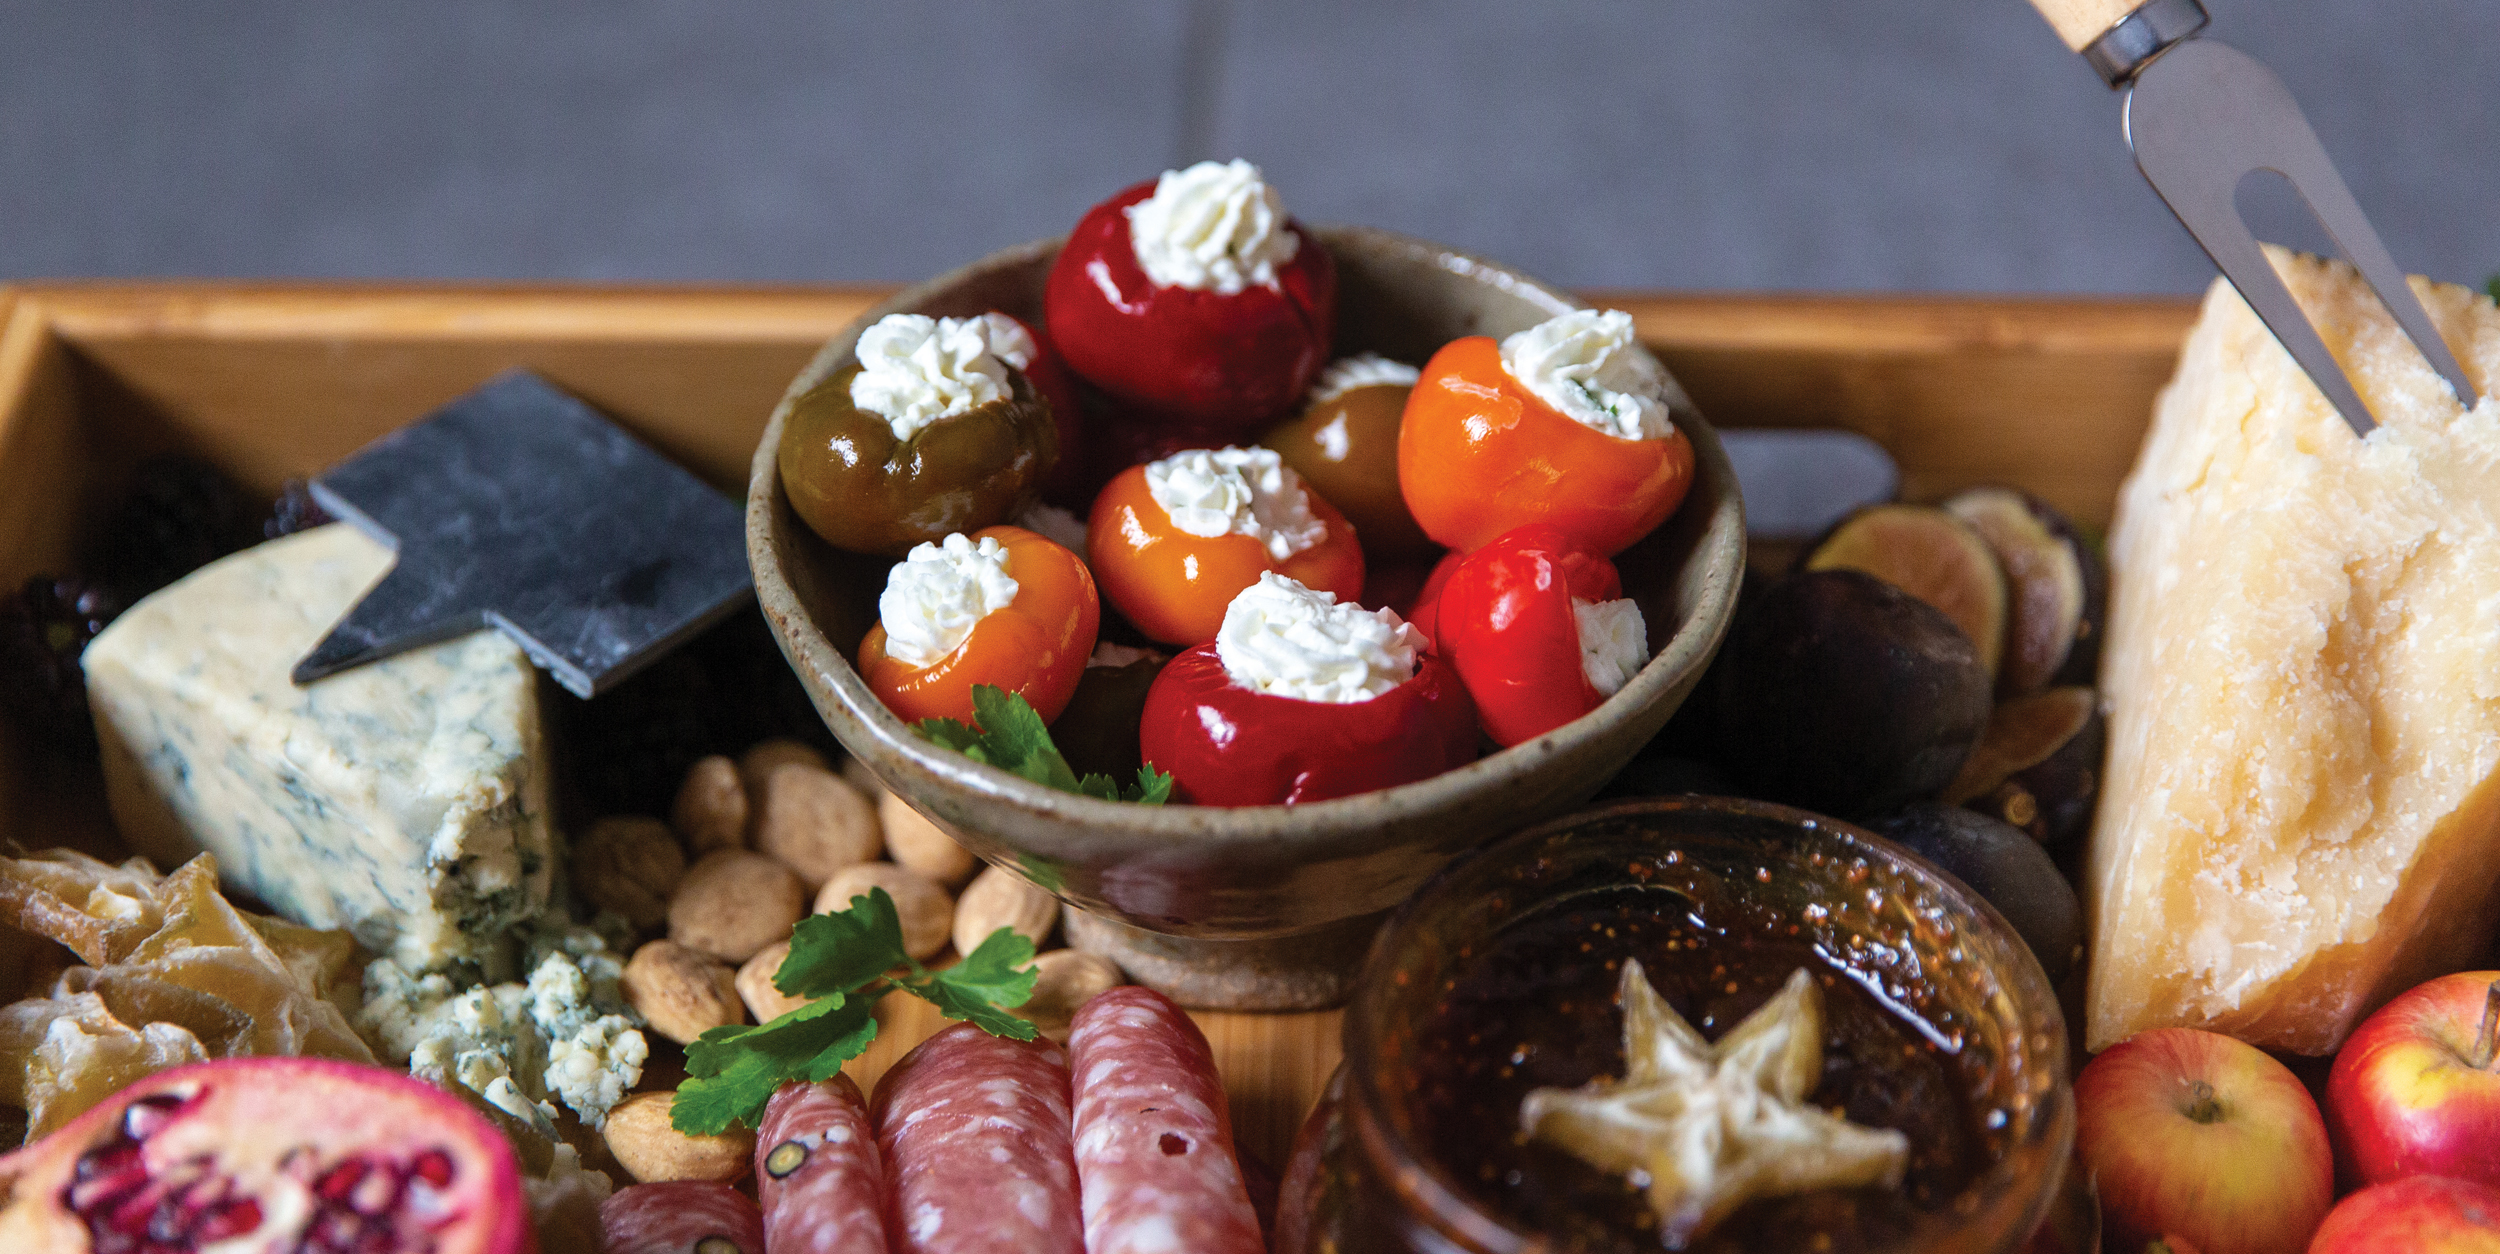
– Stuffed peppadew peppers
– Pine nut hummus
– Pumpkin chips
– Hot dill pickles
– Blackberries
– Raspberries with dark chocolate
– Pomegranate
– Candied Star Fruit
– Figs
– Crimson gold apples
– Fig & walnut preserves
– Banana pepper mustard
– Honeycomb
– Sea salt chocolate honey caramels
– Marcona almonds
– Salt & vinegar California almonds
– Pecans
– Macadamia nuts
Stuffed Peppadew Peppers
1 jar peppadew peppers (your preference of sweet or spicy)
8 oz. soft goat cheese (room temp)
3 garlic cloves (minced)
2 tablespoons chives (chopped)
1 tablespoon fresh basil (chopped)
1 tablespoon fresh thyme (chopped)
Salt & pepper (to taste)
Combine all ingredients except the peppers in a bowl. Mix until incorporated. If your cheese is too stiff and difficult to mix, a bit of heavy cream can be added to make things easier.
Completely fill each pepper with the cheese mixture. A piping bag can really help make this part easy and clean.
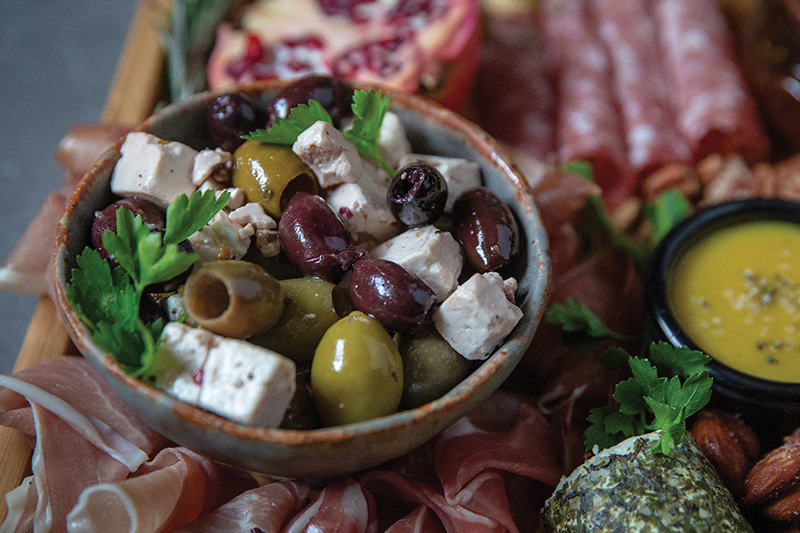
Marinated Olives with Feta
2 cups pitted olives (choose your favorite or a mixture)
1 lemon
2 tablespoons fresh parsley (chopped)
1/2 teaspoon crushed red pepper flakes
1 teaspoon dried oregano
1-2 cups extra-virgin olive oil
6 oz. feta cheese (cubed)
Peel and smash your garlic, then place them in a mason jar (can use a large ziplock bag as a substitute) along with the olives, parsley, red pepper flakes, and dried oregano.
Use a vegetable peeler to create strips of lemon peel, then add the peels along with the juice of the lemon into the jar.
Add olive oil to the jar until all the ingredients are covered. Chill overnight.
Place cubed feta in a serving bowl, then pour the entire olive mixture from the jar overtop the cheese. Chill for at least 2 more hours before serving.


